
Homelab in your pocket
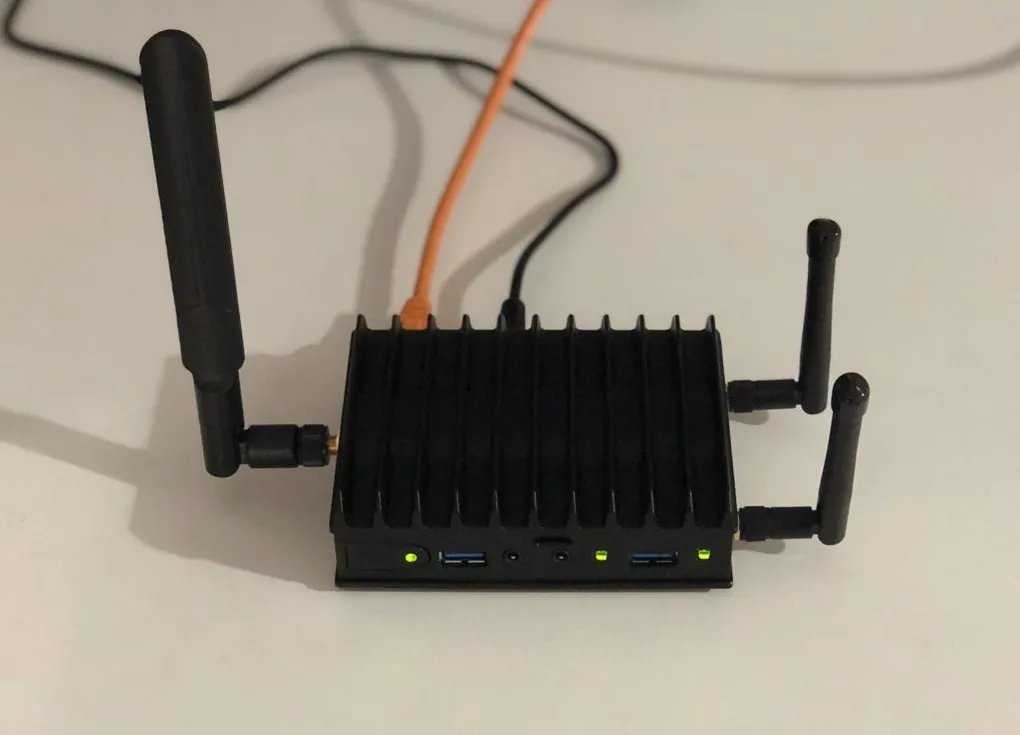
So I was just browsing reddit, and stumbled across this thing, the Fitlet 2. At first it just looked like a heatsink with antennas, so I had to look further. Turns out the specs of these things are pretty good for their form factor. This got me thinking, could this be a super portable VM host and mostly complete homelab site?
So first I’ll summarise the end result. A fully fledged VM host, with a router VM that is a Access Point, WiFi client, and 4G modem. With plenty of room for more VMs and maybe a k8s cluster.
What convinced me to buy this thing?
Normally im not too interested in low power small form factor machines, as clearly seen by the server rack in my cupboard. However there were a few things that really got me excited for this little box.
I’ve seen plenty of small form factor things, such as the Raspberry Pi line. They’re definitely improving, with the Pi 4 having 4GB ram, but they just haven’t hit the point where they can run a decent workload, and are limited in memory and storage.
One thing that got me interested was the potential specs of this thing. Although the CPU was pretty weak (Celeron J3455), its still a quad core processor, and I can’t ask for a lot more in this passive cooled form factor. This isn’t a huge deal, as most of the services I run in my homelab aren’t very CPU heavy anyway. The 2 important parts for me, the memory and storage, were where this little box shines. Up to 16GB RAM, and an M.2 slot. This really opens up opportunities with the amount you can run off this little thing.
The specs were really nice, but for the price point aren’t enough alone to justify this purchase. What really pushed me over the edge was the module system this box has. There are several choices of modules you can add, for many usecases. The combination I had in mind was the WiFi card, as well as the 4G modem.
The Plan
So with the possibilities of this thing, I realised I could create an extremely portable all in one lab. This thing would run ESXi, allowing me to create several VMs, including a router. The router VM would have several WAN sources (Ethernet, WiFI, 4G) and would also be an access point for any devices I have with me, such as laptops, phones, or tablets.
Required items
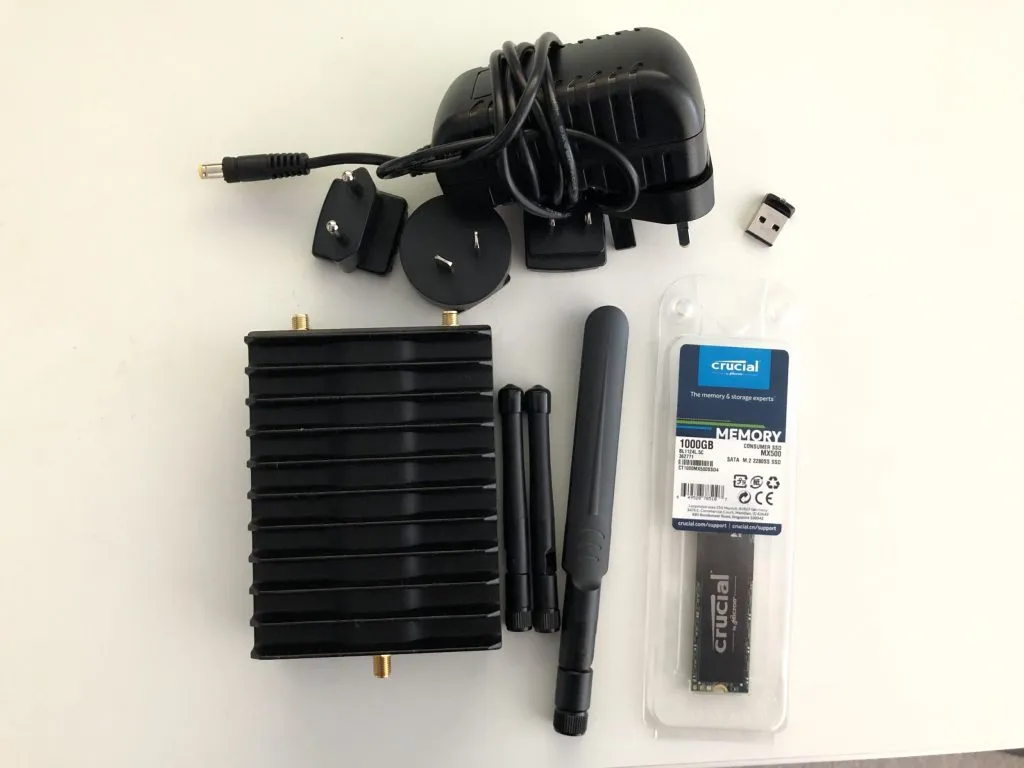
- The Fitlet2 itself
- A whole bunch of option modules:
- Expansion bracket to add more pcie/m.2 slots
- WiFi M.2 card
- 4G Modem
- Antennas
- Something to boot ESXi from (most likely a microSD card or a small USB)
- An M.2 SATA SSD (Unfortunately this device doesn’t support NVMe drives)
I quickly found out that adding all the optional modules hiked the price up quite quickly. Without the M.2 drive, which I bought separately, this all totalled up to € 588,92. At this point I started thinking about whether any of it was worth it at that cost. After a bit of thinking and reminding myself how cool this would be, I pretended to have never seen the cost and just pressed the buy button. (I wouldn’t recommend this approach)
For the M.2 drive I went for a 1TB MX500 SSD. While I could most likely get away with 256GB of VM storage, this would let me have a small NAS on the device for some fast local storage. This cost approximately £100.
Assembly
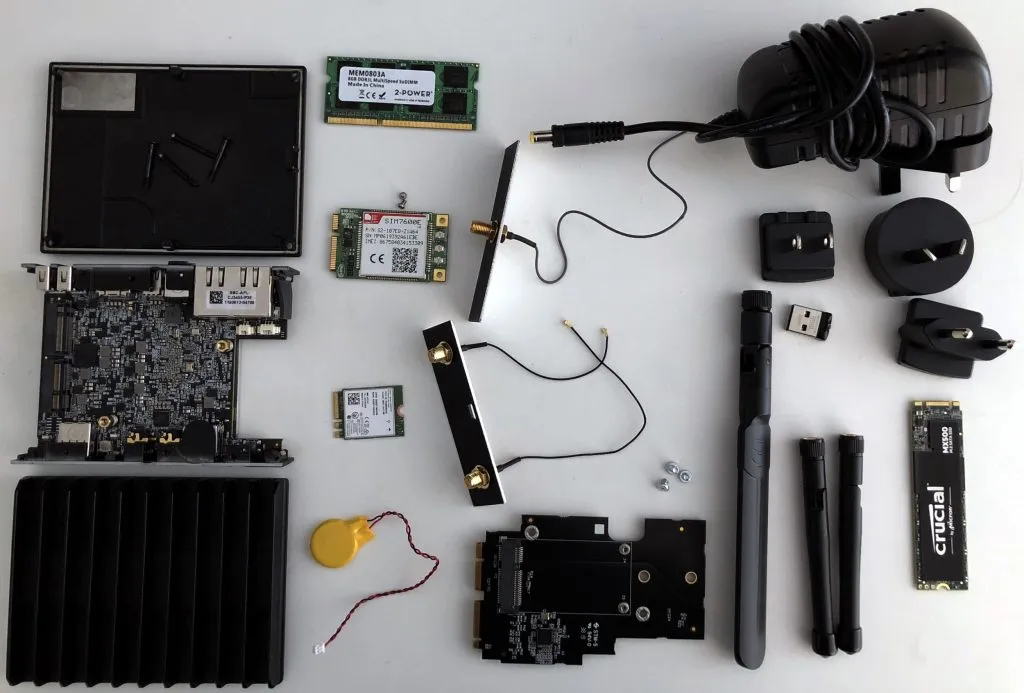
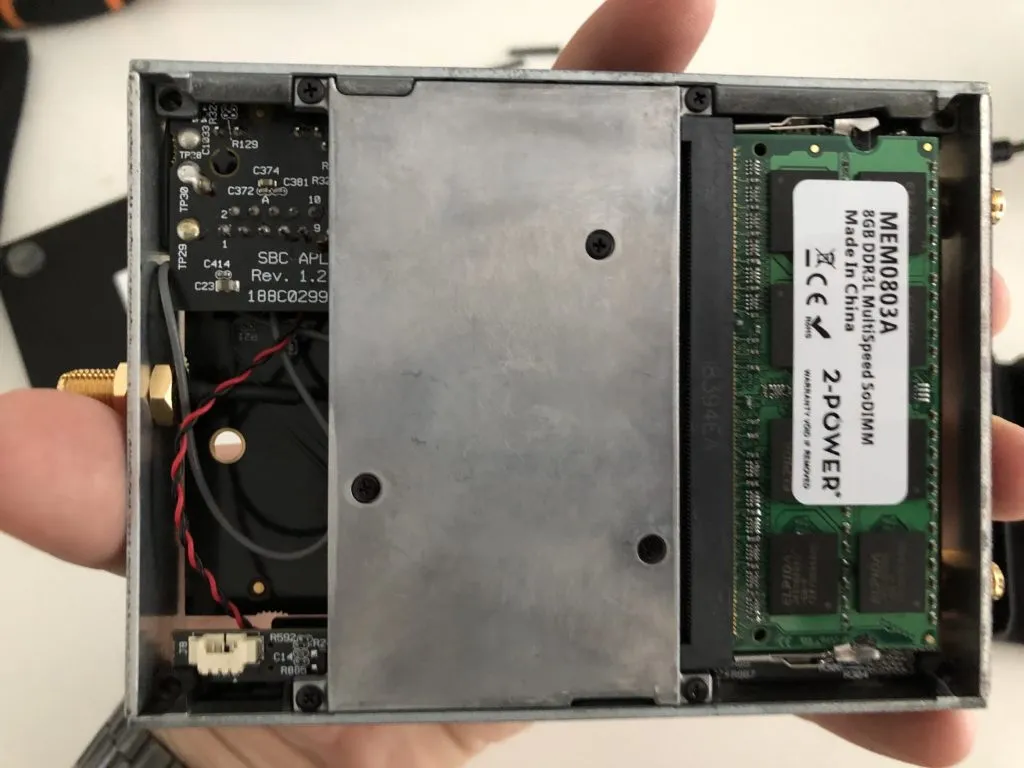
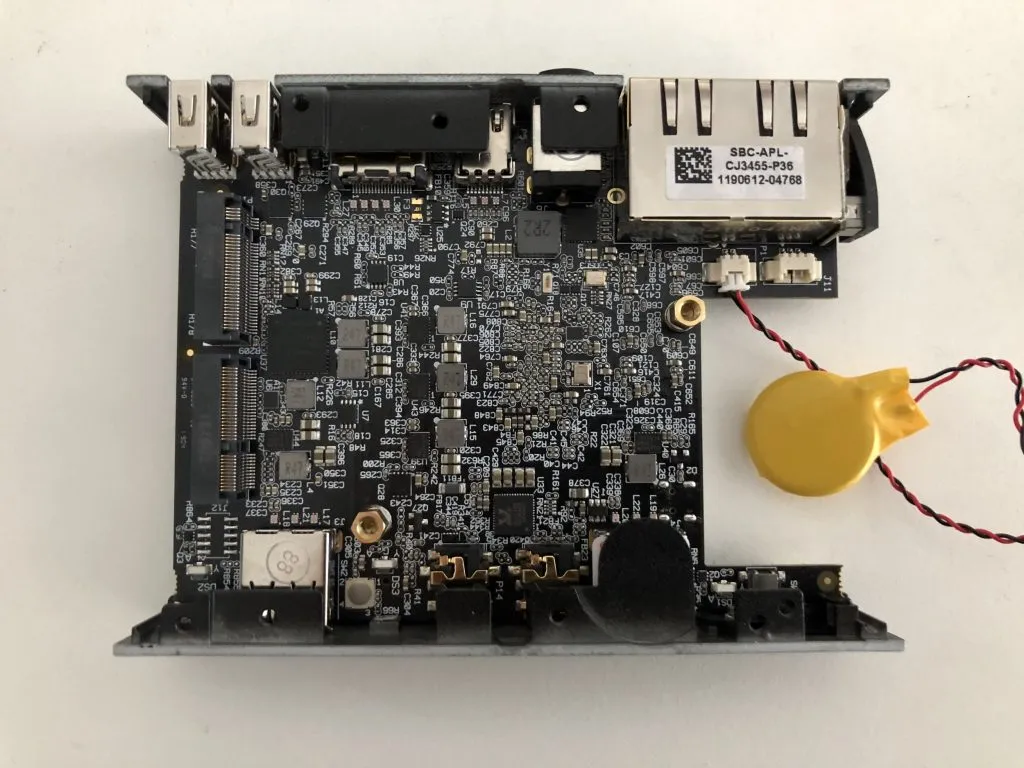
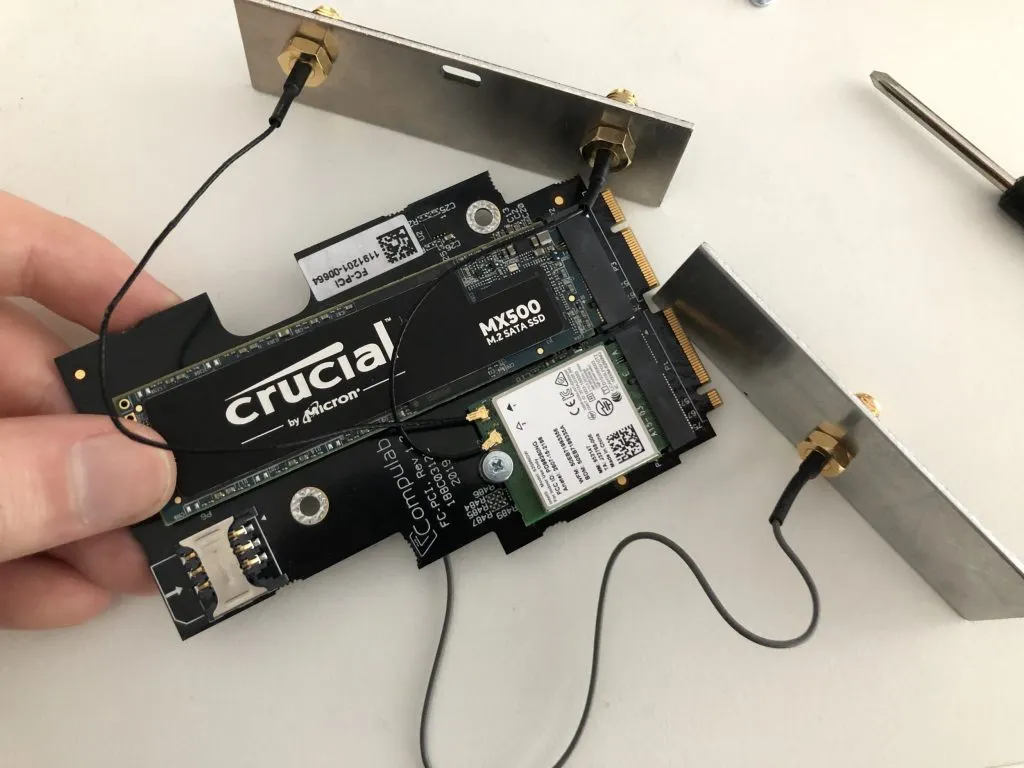
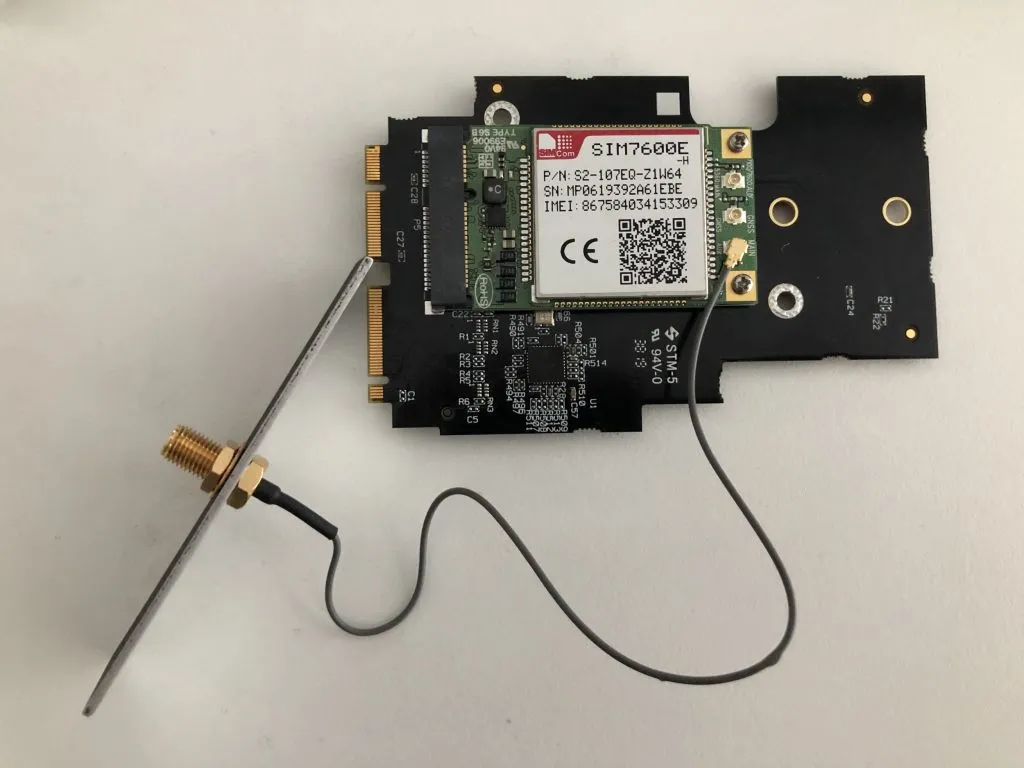
So after waiting around a week for the Fitlet2 to arrive, as well as the SSD, I had everything needed to kick this project off. It was nice to see this thing came with different plug connectors, as I plan on taking this with me when I go on holidays.
One thing I noticed when researching this device is the lack of information on how all the pieces fit together, so I was really interested in taking it apart into little pieces. Heres are some photos of the parts and how they fit together.
Installation
So the first step for installation was setting up VMWare ESXi, as this is my hypervisor of choice. This will let me integrate it with the other servers I have easily, and manage the configuration with Terraform. This was a very standard procedure, and went smoothly. I decided to install it onto a Cruzer Fit USB, as I’d used these before for lots of installations, and had some lying around.
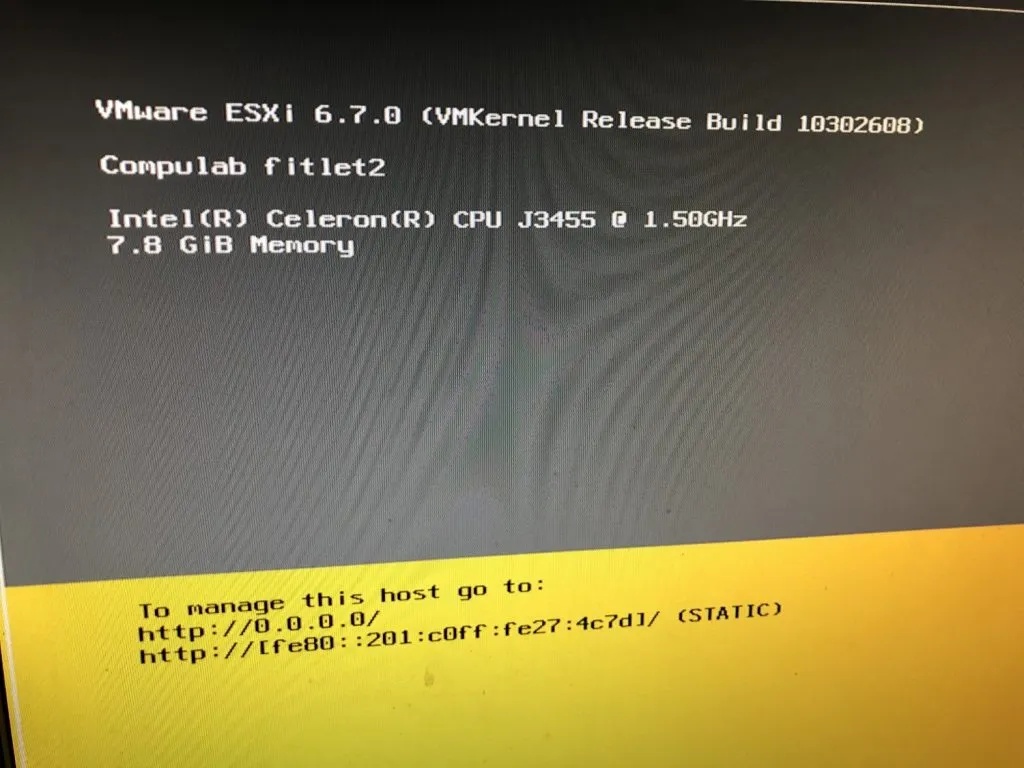
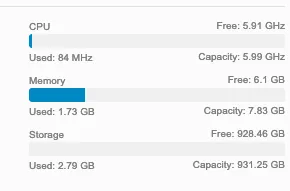
Looking at the specs in vCenter, you really wouldn’t think this device is as small as it is.
Host networking
My plan for the host networking was fairly straight forward. Since this device had 2 gigabit NICs, one would be used as a WAN connection when that is available, and the other would be the LAN connection, with any other VLANs tagged in case I needed to access them.
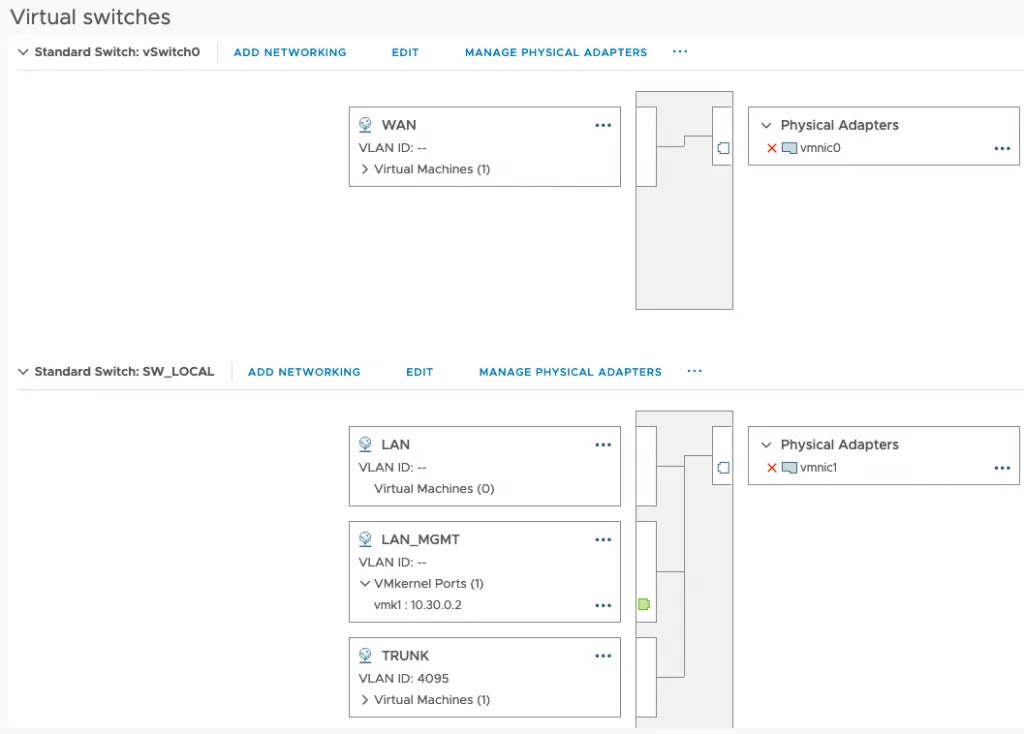
VyOS Router
The core part of this setup was the router VM. This would handle all the traffic in and out of the system, as well as the access point. For the OS, I decided to go with VyOS, as I’d recently switched to that for my other 2 sites and it performs really well with limited hardware.
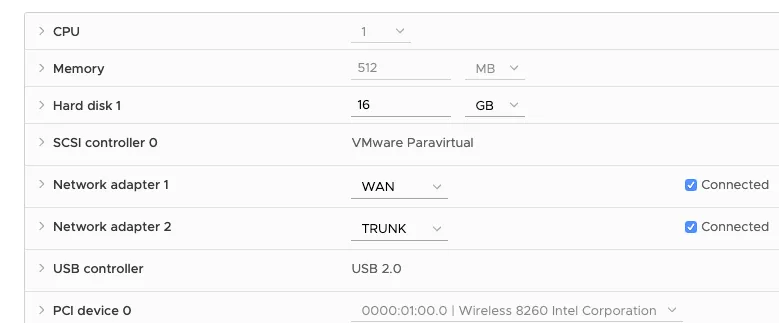
The VM would have 2 NICs. One would be on the WAN switch, and another would be a VLAN trunk for the internal network, allowing it to access all internal VLANs over one interface. It also needed to WiFi card, suppied via PCIe passthrough.
Connectivity
To connect this up to the rest of the lab, I set up a WireGuard tunnel from this little host to my server in colocation. Thanks to my existing BGP setup, all I needed to do was advertise the new networks and the routes were all populated across my other 2 sites, and everything could talk freely.
I chose the colocation server as the main connection, as this device is designed to be used away from home, where the connection to the colocation server is much better, due to it being very close to the main London interchanges, and having a symmetric gigabit line.
Conclusion
I think this little device is great. Currently it sits at approximately 8W idle, which is just mind blowing to me. I’m not totally convinced it was worth the money, but it’s definitely a fun little thing with plenty of potential. I will definitely try and push its limits soon with some more VMs.
The main issue I ran into with the setup was getting VyOS to use the WiFi card as both an access point and a client simultaneously. The solution took a bit of poking around, with very little information. I think it warrants it’s own blog post, so I will be writing about that shortly.
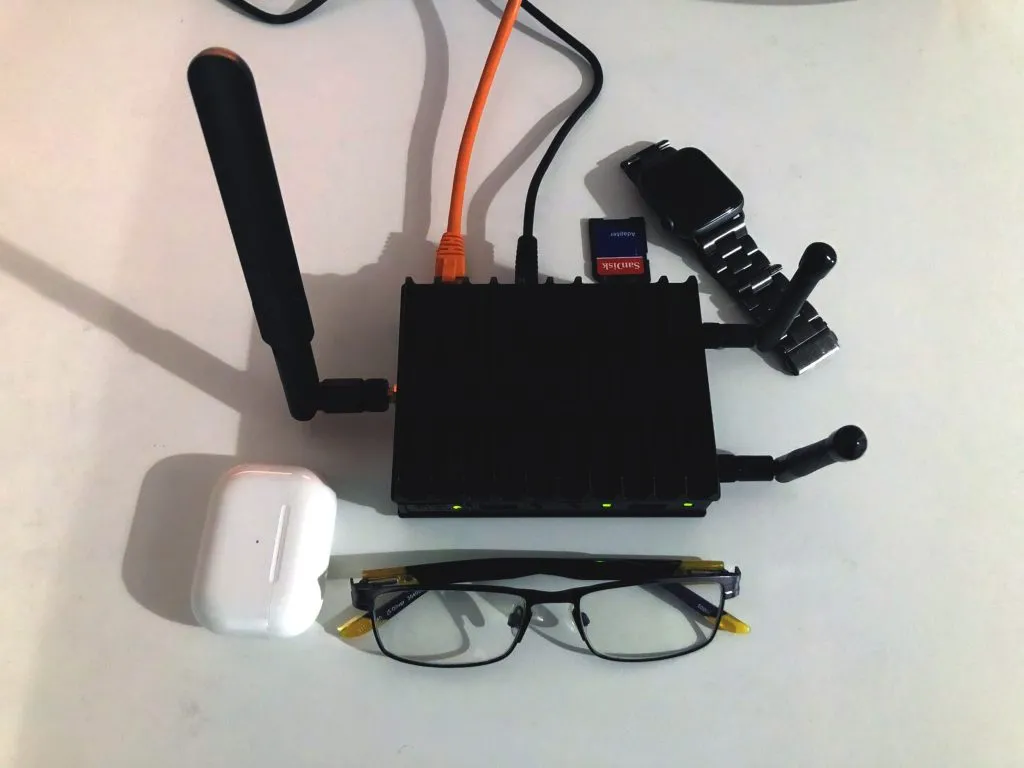
At the time of writing the COVID-19 panic is in full swing, so I don’t have any bananas for scale. So here are some other items to help you compare.
What’s Next?
There are several things that still need doing, the main one being the 4G connection. I would love to get this working, but I’m sure it will need some tinkering, so will be a future project. Along with this, I need to setup some failover of the WAN connections, so it priorities it accordingly (Ethernet > WiFi > 4G)